Categories
Random

Performance Benchmarks on CentOS 7 Linux

In a scenario where a VM is moved to different underlying hardware, it is generally a good idea to validate CPU, memory, disk IO and network.

CPU Benchmark

sysbench cpu --cpu-max-prime=20000 run

sysbench threads --num-threads=10 --thread-yields=0 --max-requests=100000000 --thread-locks=1 run

Memory Benchmark

sysbench memory --memory-block-size=1M --memory-total-size=100G run
sysbench memory --memory-total-size=10G run

File IO

sysbench fileio --file-total-size=5G prepare; sysbench fileio --file-total-size=5G --file-test-mode=rndrw --time=300 --max-requests=0 run
# Clean up
sysbench fileio --file-total-size=5G cleanup

Network latency, upload and download

wget https://raw.githubusercontent.com/sivel/speedtest-cli/master/speedtest.py; ./speedtest.py; rm -f ./speedtest.py
Categories
Random

Office 365 Send As an Alias

If you want to have a single mailbox on Office 365 and be able to send as aliases of that mailbox, you will need to do some work around as it is not really support by Microsoft, see:

1 – Create Distribution List

  1. Create distribution group for the desired email address (ensuring is does not exist as an alias or otherwise in the tenant)
  2. Add desired destination mailbox as a member
  3. Open the Exchange Admin center
  4. Select “recipients” (side navbar) -> Select “groups” (top) -> Select the distribution group you just created, click the pencil icon to edit
  5. Select “group delegation” add your main mailbox user to the ‘Send As’ list
  6. Wait for approx 30 mins for Office 365 to provision the distribution list and update contact lists
  7. Optionally set up message rules in your mailbox to ensure emails to the distribution list email address are put into a specific folder

2 – Send As the distribution list via Outlook (Windows)

  1. In your Outlook client, create a new message
  2. If you cant see the From box, click ‘Options’, Click ‘From’
  3. Click on the now display ‘From’ dropbox and select ‘Other email address’
  4. Click on the ‘From…’ in the popup box
  5. Click on the ‘Offline Global Address List’, select ‘All Distribution Lists’, select your desired From address.

3 – Exchange Online

  1. Create new message
  2. Click the ellipsis to the right of the send button
  3. Right click on the from address, click remove
  4. Start typing the address you want to send from, select it from the drop down autocompleter
Categories
Random

3D CAD Fundamental – Week 3

Building a toy house module

Looks primarily at changing object shapes, introducing the move too and the 2-point arch tool. Using double click for repetition of push/pull tool also proved to be convenient. We then used the move tool to alter slopes of surfaces, including using the up key to match slope and then height of another surface.

Next up is the arc tool, which has 4 variants:

  • Arc – Main point of this method determines where the center point of the arc will be
  • 2 Point Arc – select two points that will be the width of the arc
  • 3 Point Arc – Firts 2 points determine form, and the third point gives that exact length Ideal for irregularly shaped objects
  • Pie

The week 3 assignment was creating a house to match a floor, wall and roof plan. Unfortunately it appears that the assignment specification had a couple of slight errors. This was a bit of a time waste and student from the previous course had reported it so it is a bit disappointing that the course writers have not noticed/corrected it: https://www.coursera.org/learn/3d-cad-fundamental/discussions/weeks/3/threads/QTxAZ5UGEeir3xJNYGdMZA

Again the first pass took a while and was quite difficult, but a complete redraw took only 5 mins. When drawing structures like this, with eves and and sloped roofs it is important to complete a room (minus the eves and roof thickness) to make slope matching easier.

week 3 simple house
Categories
GoLang Web Application Random

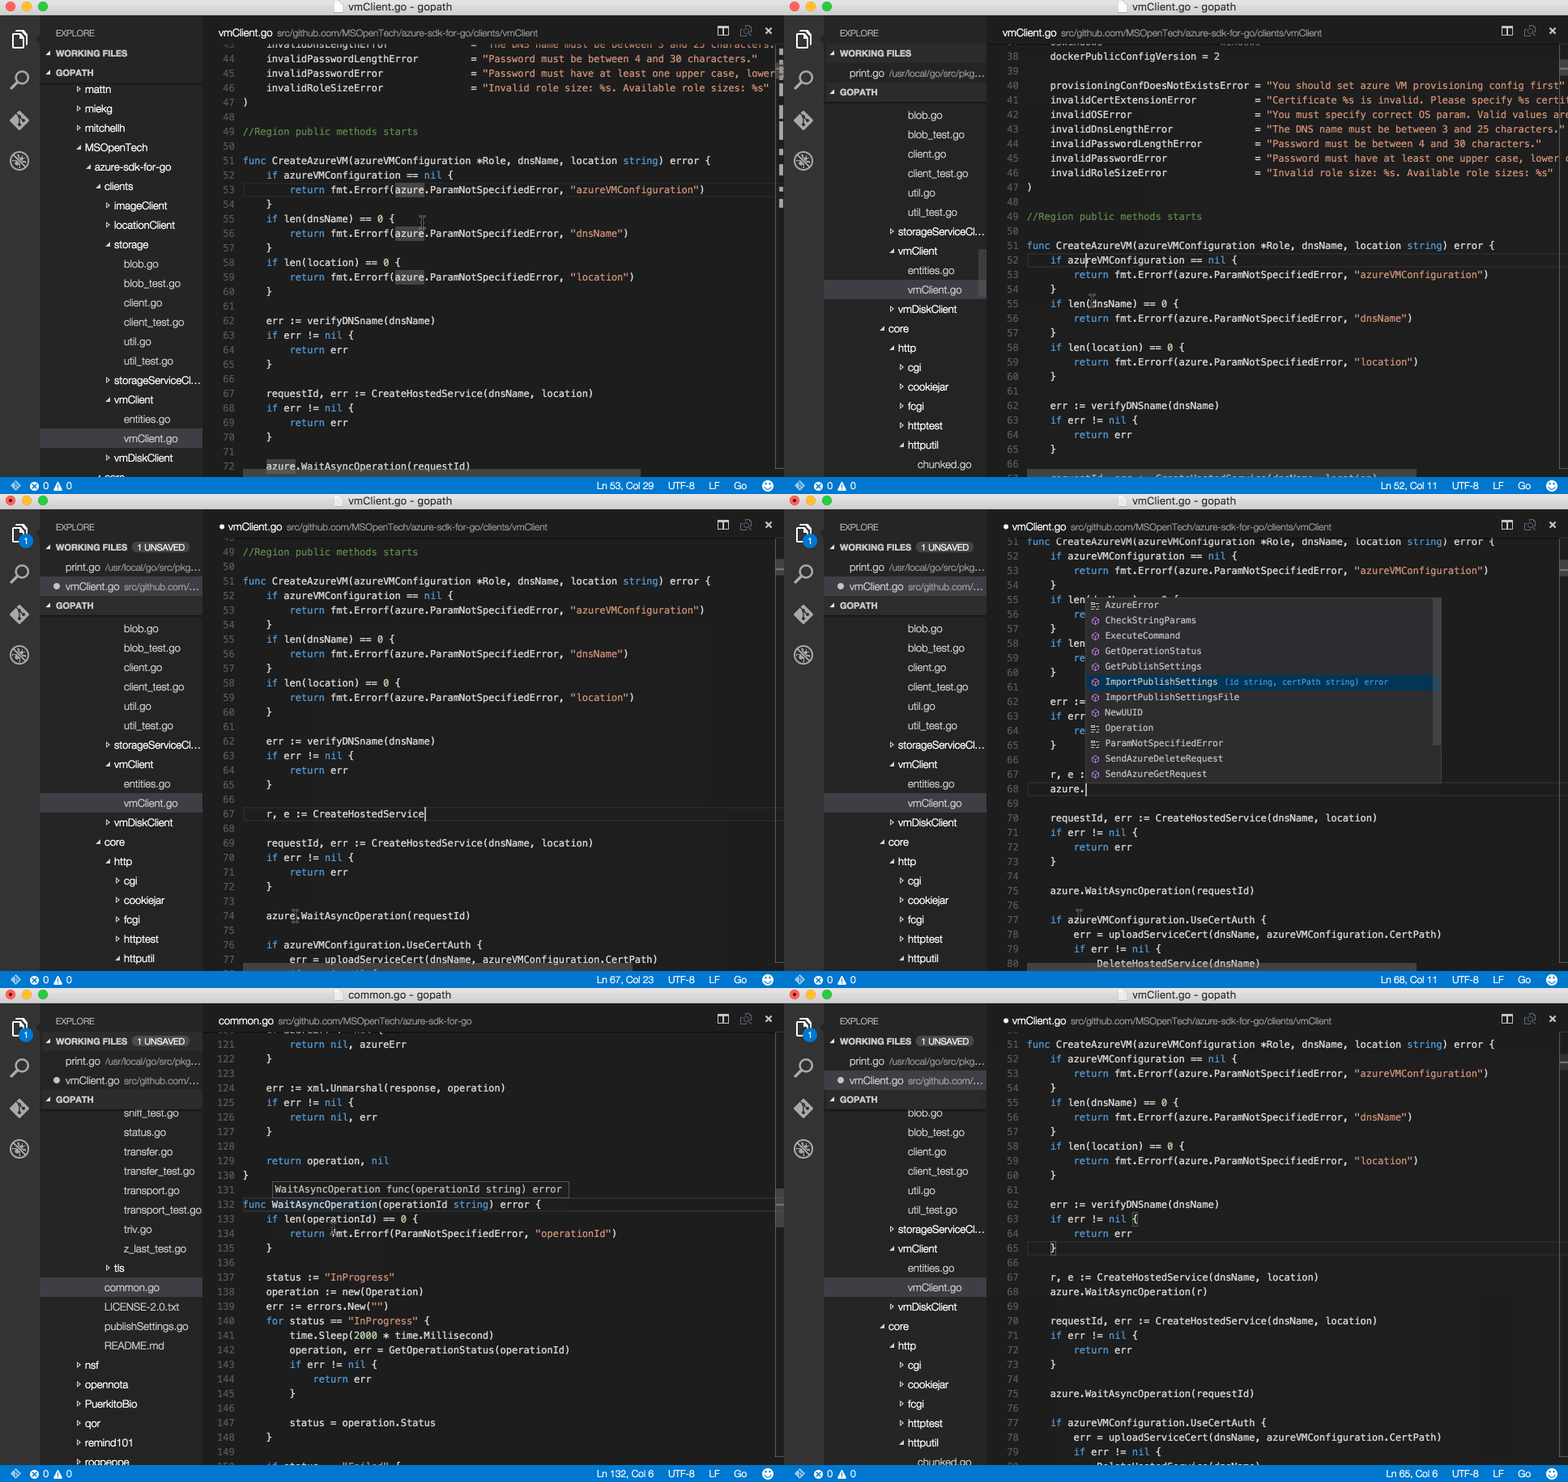
Free Golang IDE (s) on macos (Visual Studio Code / vim)

Visual Studio Code

Visual Studio Code is a now is Microsoft’s now OpenSource IDE that runs on windows, macos and linux!

Simple set up guide here: https://rominirani.com/setup-go-development-environment-with-visual-studio-code-7ea5d643a51a. Assuming go is installed and ready to do – the download, install and setup took about 5 minutes. Everything just works out of the box and its much less dependency on complex config files and plugins (vs vim).


Vim (abandoned this for Microsoft Visual Code)

Install these if they are not already:

brew install vim
# Note that is is executing arbitrary code from an the vim-go repo 
curl -fLo ~/.vim/autoload/plug.vim --create-dirs https://raw.githubusercontent.com/junegunn/vim-plug/master/plug.vim 
git clone https://github.com/fatih/vim-go.git ~/.vim/plugged/vim-go
  • Customise ~/.vimrc to enable and configure your plugins and shortcut keys
  • Once th ~/.vimrc is added run :GoInstallBinaries to get vim-go’s dependencies

Shortcut keys in this vimrc:

  • \ + b -> build
    • if errors occur toggle forward and back through them with ctrl + n and ctrl + m
    • close quick fix dialogue boxes with \ + a
  • \ + i -> install
  • dif (whilst on func def, delete all contents for func)

Autocompletion sucks though 🙁 so adding neocomplete is a must).

With existing versions of brew installed vim and the introduced dependency of xcode makes the setup time high. I went through this in the past and after a fairly long hiatus from writing code if find nothing is working quite right.


Categories
Random

Download all Evernote attachments via Evernote API with Python

Python script for downloading snapshots of all attachments in all of your Evernote notebooks.

#!/usr/bin/python
import json, os, pickle, httplib2, io
import evernote.edam.userstore.constants as UserStoreConstants
import evernote.edam.type.ttypes as Types
from evernote.api.client import EvernoteClient
from evernote.edam.notestore.ttypes import NoteFilter, NotesMetadataResultSpec
from datetime import date

# Pre-reqs: pip install evernote 
# API key from https://dev.evernote.com/#apikey

os.environ["PYTHONPATH"] = "/Library/Python/2.7/site-packages"

CREDENTIALS_FILE=".evernote_creds.json"
LOCAL_TOKEN=".evernote_token.pkl"
OUTPUT_DIR=str(date.today())+"_evernote_backup"

def prepDest():
    if not os.path.exists(OUTPUT_DIR):
        os.makedirs(OUTPUT_DIR)
        return True
    return True

# Helper function to turn query string parameters into a 
# source: https://gist.github.com/inkedmn
def parse_query_string(authorize_url):
    uargs = authorize_url.split('?')
    vals = {}
    if len(uargs) == 1:
        raise Exception('Invalid Authorization URL')
    for pair in uargs[1].split('&'):
        key, value = pair.split('=', 1)
        vals[key] = value
    return vals

class AuthToken(object):
    def __init__(self, token_list):
        self.oauth_token_list = token_list

def authenticate():
    def storeToken(auth_token):
        with open(LOCAL_TOKEN, 'wb') as output:
            pickle.dump(auth_token, output, pickle.HIGHEST_PROTOCOL)    

    def oauthFlow():
        with open(CREDENTIALS_FILE) as data_file:    
            data = json.load(data_file)
            client = EvernoteClient(
                consumer_key = data.get('consumer_key'),
                consumer_secret = data.get('consumer_secret'),
                sandbox=False
            )
        request_token = client.get_request_token('https://assetowl.com')
        print(request_token)
        print("Token expired, load in browser: " + client.get_authorize_url(request_token))
        print "Paste the URL after login here:"
        authurl = raw_input()
        vals = parse_query_string(authurl)
        auth_token=client.get_access_token(request_token['oauth_token'],request_token['oauth_token_secret'],vals['oauth_verifier'])
        storeToken(AuthToken(auth_token))
        return auth_token

    def storeToken(auth_token):
        with open(LOCAL_TOKEN, 'wb') as output:
            pickle.dump(auth_token, output, pickle.HIGHEST_PROTOCOL)    

    def getToken():
        store_token=""
        if os.path.isfile(LOCAL_TOKEN):
            with open(LOCAL_TOKEN, 'rb') as input:
              clientt = pickle.load(input)
            store_token=clientt.oauth_token_list
        return store_token

    try:
        client = EvernoteClient(token=getToken(),sandbox=False)
        userStore = client.get_user_store()
        user = userStore.getUser()
    except Exception as e:
        print(e)
        client = EvernoteClient(token=oauthFlow(),sandbox=False)
    return client

def listNotes(client):
    note_list=[]
    note_store = client.get_note_store()
    filter = NoteFilter()    
    filter.ascending = False
    spec = NotesMetadataResultSpec(includeTitle=True)
    spec.includeTitle = True
    notes = note_store.findNotesMetadata(client.token, filter, 0, 100, spec)
    for note in notes.notes:
        for resource in note_store.getNote(client.token, note.guid, False, False, True, False).resources:
            note_list.append([resource.attributes.fileName, resource.guid])
    return note_list


def downloadResources(web_prefix, res_array):
    for res in res_array:
        res_url = "%sres/%s" % (web_prefix, res[1])
        print("Downloading: " + res_url + " to " + OUTPUT_DIR + res[0])
        h = httplib2.Http(".cache")
        (resp_headers, content) = h.request(res_url, "POST",
                                        headers={'auth': DEV_TOKEN})
        with open(os.path.join(OUTPUT_DIR, res[0]), "wb") as wer:
            wer.write(content)

def main():
    if prepDest():
        client = authenticate()
        user_store=client.get_user_store()
        web_prefix = user_store.getPublicUserInfo(user_store.getUser().username).webApiUrlPrefix
        downloadResources(web_prefix, listNotes(client))

if __name__ == '__main__':
    main()

Categories
Random

Downloading Google Drive with Python via Drive API

Python script for downloading snapshots of all file in your google drive, including those shared with you.

source: https://github.com/SecurityShift/tools/blob/master/backup_scripts/google_drive_backup.py


Categories
Random

Configuring Snort Rules

Some reading before starting:

Before setting out, getting some basic concepts about snort is important.

This deployment with be in Network Intrusion Detection System (NIDS) mode – which performs detection and analysis on traffic. See other options and nice and concise introduction:  http://manual.snort.org/node3.html.

Rule application order: activation->dynamic->pass->drop->sdrop->reject->alert->log

Again drawing from the snort manual some basic understanding of snort alerts can be found:

    [**] [116:56:1] (snort_decoder): T/TCP Detected [**]

116 –  Generator ID, tells us what component of snort generated the alert

Eliminating false positives

After running pulled pork and using the default snort.conf there will likely be a lot of false positives. Most of these will come from the preprocessor rules. To eliminate false positives there are a few options, to retain maintainability of the rulesets and the ability to use pulled pork, do not edit rule files directly. I use the following steps:

  1. Create an alternate startup configuration for snort and barnyard2 without -D (daemon) and barnyard2 config that only writes to stdout, not the database. – Now we can stop and start snort and barnyard2 quickly to test our rule changes.
  2. Open up the relevant documentation, especially for preprocessor tuning – see the ‘doc’ directory in the snort source.
  3. Have some scripts/traffic replays ready with traffic/attacks you need to be alerting on
  4. Iterate through reading the doc, making changes to snort.conf(for preprocessor config), adding exceptions/suppressions to snort’s threshold.conf or PulledPork’s disablesid, dropsid, enablesid, modifysid confs for pulled pork and running the IDS to check for false positives.

If there are multiple operating systems in your environment, for best results define ipvars to isolate the different OSs. This will ensure you can eliminate false positives whilst maintaining a tight alerting policy.

HttpInspect

From doc: HttpInspect is a generic HTTP decoder for user applications. Given a data buffer, HttpInspect will decode the buffer,  find HTTP fields, and normalize the fields. HttpInspect works on both client requests and server responses.

Global config –

Custom rules

Writing custom rules using snorts lightweight rules description language enables snort to be used for tasks beyond intrusion detection. This example will look at writing a rule to detect Internet Explorer 6 user agents connecting to port 443.

Rule Headers -> [Rule Actions, Protocols, IP Addresses and ports, Direction Operator,

Rule Options -> [content: blah;msg: blah;nocase;HTTP_header;]

Rule Option categories:

  • general – informational only — msg:, reference:, gid:, sid:, rev:, classtype:, priority:, metadata:
  • payload – look for data inside the packet —
    • content: set rules that search for specific content in the packet payload and trigger a response based on that data (Boyer-Moore pattern match). If there is a match anywhere within the packets payload the remainder of the rule option tests are performed (case sensitive). Can contain mixed text and binary data. Binary data is represented as hexdecimal with pipe separators — (content:”|5c 00|P|00|I|00|P|00|E|00 5c|”;). Multiple content rules can be specified in one rule to reduce false positives. Content has a number of modifiers: [nocase, rawbytes, depth, offset, distance, within, http_client_body, http_cookie, http_raw_cookie, http_header, http_raw_header, http_method, http_uri, http_raw_uri, http_stat_code, http_stat_msg, fast_pattern.
  • non-payload – look for non-payload data
  • post-detection – rule specific triggers that are enacted after a rule has been matched
Categories
Random

Validating certificate chains with openssl

Using openssl to verfiy certificate chains is pretty straight forward – see a full script below.

One thing that confused me for a bit was how to specify trust anchors without importing them to the pki config of the os (I also did not want to accept all of the trust anchors).

So.. here what to do for specif trust anchors

# make a directory and copy in all desired trust anchors
# make sure the certs are in pem format, named <bah>.pem
mkdir ~/trustanchors
# create softlinks with hash 
cd ~/trustanchors
for X in ./*.pem;do ln -s $X ./`openssl x509 -hash -noout -in $X`.0;done

# confirm the trust anchor(s) are working as expected
openssl verify -CApath ~/trustanchors -CAfile <some_intermediate>.pem <my_leaf>.pem

So here’s a simple script that will pull the cert chain from a [domain] [port] and let you know if it is invalid – note there will likely be come bugs from characters being encoded / return carriages missing:

#!/bin/bash

# chain_collector.sh [domain] [port]
# output to stdout
# assumes you have a directory with desired trust anchors at ~/trustanchors

if [ $# -ne 2 ]; then
	echo "USAGE: chain_collector.sh [domain] [port]"
	exit 1
fi

TRUSTANCHOR_DIR="~/trustanchors"
SERVER=$1:$2
TFILE="/tmp/$(basename $0).$$.tmp"
OUTPUT_DIR=$1_$2
mkdir $OUTPUT_DIR

openssl s_client -showcerts -servername $1 -connect $SERVER 2>/dev/null > $TFILE
awk 'BEGIN {c=0;} /BEGIN CERT/{c++} { print > "tmpcert." c ".pem"}' < $TFILE 
i=1 
for X in tmpcert.*.pem; do
    if openssl x509 -noout -in $X 2>/dev/null ; then 
        echo "#############################"
        cn=$(openssl x509 -noout -subject -in $X | sed -e 's#.*CN=\(\)#\1#')
	echo CN: $cn
	cp $X $OUTPUT_DIR/${cn// /_}.$((i-1)).pem 
	cert_expiry_date=$(openssl x509 -noout -enddate -in $X \
			| awk -F= ' /notAfter/ { printf("%s\n",$NF); } ')
	seconds_until_expiry=$(echo "$(date --date="$cert_expiry_date" +%s) \ 
                                     - $(date +%s)" |bc)
        days_until_expiry=$(echo "$seconds_until_expiry/(60*60*24)" |bc)
	echo Days until expiry: $days_until_expiry
	echo $(openssl x509 -noout -text -in $X | \ 
                grep -m1 "Signature Algorithm:" | head)
	echo $(openssl x509 -noout -issuer -in $X)
	if [ -a tmpcert.$i.pem ]; then
		echo Parent: $(openssl x509 -noout -subject \ 
                                   -in tmpcert.$i.pem | sed -e 's#.*CN=\(\)#\1#')
	        echo Parent Valid? $(openssl verify -verbose -CAfile tmpcert.$i.pem $X)	
	else
		echo "Parent Valid? This is the trust anchor"
	fi
	echo "#############################"
    fi
    ((i++))
done
rm -f tmpcert.*.pem $TFILE
Categories
Random

SSL Review part 2

RSA in practice

Initializing SSL/TLS with https://youtube.com

In this example the youtube server is authenticated via it’s certificate and an encrypted communication session established. Taking a packet capture of the process enables simple identification of the TLSv1.1 handshake (as described: http://en.wikipedia.org/wiki/Transport_Layer_Security#TLS_handshake):

Packet capture download: http://mchost/sourcecode/security_notes/youtube_TLSv1.1_handshake_filtered.pcap

The packet capture starts with the TCP three-way handshake – Frames 1-3

With a TCP connection established the TLS handshake begins, Negotiation phase:

  1. ClientHello – Frame 4 – A random number[90:fd:91:2e:d8:c5:e7:f7:85:3c:dd:f7:6d:f7:80:68:ae:2b:05:8e:03:44:f0:e8:15:22:69:b7], Cipher suites, compression methods and session ticket (if reconnecting session).
  2. ServerHello – Frame 6 – chosen protocol version [TLS 1.1], random number [1b:97:2e:f3:58:70:d1:70:d1:de:d9:b6:c3:30:94:e0:10:1a:48:1c:cc:d7:4d:a4:b5:f3:f8:78], CipherSuite [TLS_ECDHE_ECDSA_WITH_RC4_128_SHA], Compression method [null], SessionTicket [null]
  3. Server send certificate message (depending on cipher suite)
  4. Server sends ServerHelloDone
  5. Client responds with ClientKeyExchange containing PreMasterSecret, public key or nothing. (depending on cipher suite) – PreMasterSecret is encrypted using the server public key
  6. Client and server use the random numbers and PreMsterSecret to compute a common secret – master secret
  7. Client sends ChangeCipherSpec record
  8. Client sends authenticated and encrypted Finished – contains a hash and MAC of previous handshake message
  9. Server decrypts the hash and MAC to verify
  10. Server sends ChangeCipherSpec
  11. Server sends Finished – with hash and MAC for verification
  12. Application phase – the handshake is now complete, application protocol enable with content type 23

client random: 90:fd:91:2e:d8:c5:e7:f7:85:3c:dd:f7:6d:f7:80:68:ae:2b:05:8e:03:44:f0:e8:15:22:69:b7 = 10447666340000000000

server random: 1b:97:2e:f3:58:70:d1:70:d1:de:d9:b6:c3:30:94:e0:10:1a:48:1c:cc:d7:4d:a4:b5:f3:f8:78 = 1988109383203082608

Interestingly the negotiation with youtube.com and chromium browser resulted in Elliptic Curve Cryptography (ECC) Cipher Suitesfor Transport Layer Security (TLS) as the chosen cipher suite.

Note that there is no step mention here for the client to verify then certificate. In the past most browsers would query a certificate revocation list (CRL), though browsers such as chrome now maintain either ignore CRL functionality or use certificate pinning.

Chrome will instead rely on its automatic update mechanism to maintain a list of certificates that have been revoked for security reasons. Langley called on certificate authorities to provide a list of revoked certificates that Google bots can automatically fetch. The time frame for the Chrome changes to go into effect are “on the order of months,” a Google spokesman said. – source: http://arstechnica.com/business/2012/02/google-strips-chrome-of-ssl-revocation-checking/

Categories
Random

nf_conntrack: table full, dropping packet on Nessus server

Issue caused by having iptables rule/s that track connection state. If the number of connections being tracked exceeds the default nf_conntrack table size [65536] then any additional connections will be dropped. Most likely to occur on machines used for NAT and scanning/discovery tools (such as Nessus and Nmap).

Symptoms: Once the connection table is full any additional connection attempts will be blackholed.


This issue can be detected using:

$dmesg
nf_conntrack: table full, dropping packet.
...

Current conntrack settings can be displayed using:

$sysctl -a | grep conntrack
net.netfilter.nf_conntrack_generic_timeout = 600
net.netfilter.nf_conntrack_tcp_timeout_syn_sent = 120
net.netfilter.nf_conntrack_tcp_timeout_syn_recv = 60
net.netfilter.nf_conntrack_tcp_timeout_established = 432000
net.netfilter.nf_conntrack_tcp_timeout_fin_wait = 120
net.netfilter.nf_conntrack_tcp_timeout_close_wait = 60
net.netfilter.nf_conntrack_tcp_timeout_last_ack = 30
net.netfilter.nf_conntrack_tcp_timeout_time_wait = 120
net.netfilter.nf_conntrack_tcp_timeout_close = 10
net.netfilter.nf_conntrack_tcp_timeout_max_retrans = 300
net.netfilter.nf_conntrack_tcp_timeout_unacknowledged = 300
net.netfilter.nf_conntrack_tcp_loose = 1
net.netfilter.nf_conntrack_tcp_be_liberal = 0
net.netfilter.nf_conntrack_tcp_max_retrans = 3
net.netfilter.nf_conntrack_udp_timeout = 30
net.netfilter.nf_conntrack_udp_timeout_stream = 180
net.netfilter.nf_conntrack_icmpv6_timeout = 30
net.netfilter.nf_conntrack_icmp_timeout = 30
net.netfilter.nf_conntrack_acct = 0
net.netfilter.nf_conntrack_events = 1
net.netfilter.nf_conntrack_events_retry_timeout = 15
net.netfilter.nf_conntrack_max = 65536
net.netfilter.nf_conntrack_count = 1
net.netfilter.nf_conntrack_buckets = 16384
net.netfilter.nf_conntrack_checksum = 1
net.netfilter.nf_conntrack_log_invalid = 0
net.netfilter.nf_conntrack_expect_max = 256
net.ipv6.nf_conntrack_frag6_timeout = 60
net.ipv6.nf_conntrack_frag6_low_thresh = 196608
net.ipv6.nf_conntrack_frag6_high_thresh = 262144
net.nf_conntrack_max = 65536

To check the current number of connections being tracked by conntrack:

/sbin/sysctl net.netfilter.nf_conntrack_count

Options for fixing the issue are:

  1. Stop using stateful connection rules in iptables (probably not an option in most cases)
  2. Increase the size of the connection tracking table (also requires increasing the conntrack hash table)
  3. Decreasing timeout values, reducing how long connection attempts are stored (this is particularly relevant for Nessus scanning machines that can be configured to attempt many simultaneous port scans across an IP range)


Making the changes in a persistent fashion RHEL 6 examples:

# 2: Increase number of connections
echo "net.netfilter.nf_conntrack_max = 786432" >> /etc/sysctl.conf
echo "net.netfilter.nf_conntrack_buckets = 196608" >> /etc/sysctl.conf
# Increase number of bucket to change ration from 1:8 to 1:4 (more # memory use but better performance)
echo 'echo "196608" > /sys/module/nf_conntrack/parameters/hashsize' >> /etc/rc.local

# 3: Alter timeout values
# Generic timeout from 10 mins to 1 min
echo "net.netfilter.nf_conntrack_generic_timeout = 60" > /etc/sysctl.conf

# Change unacknowledged timeout to 30 seconds (from 10 mins)
echo "net.netfilter.nf_conntrack_tcp_timeout_unacknowledged = 30" > /etc/sysctl.conf

# Change established connection timeout to 1 hour (from 10 days)
echo "net.netfilter.nf_conntrack_tcp_timeout_established = 3600" > /etc/sysctl.conf

These changes will persist on reboot.

To apply changes without reboot run the following:

sysctl -p
echo "196608" > /sys/module/nf_conntrack/parameters/hashsize

To review changes:

sysctl -a | grep conntrack

Reference and further reading: http://antmeetspenguin.blogspot.com.au/2011/01/high-performance-linux-router.html